
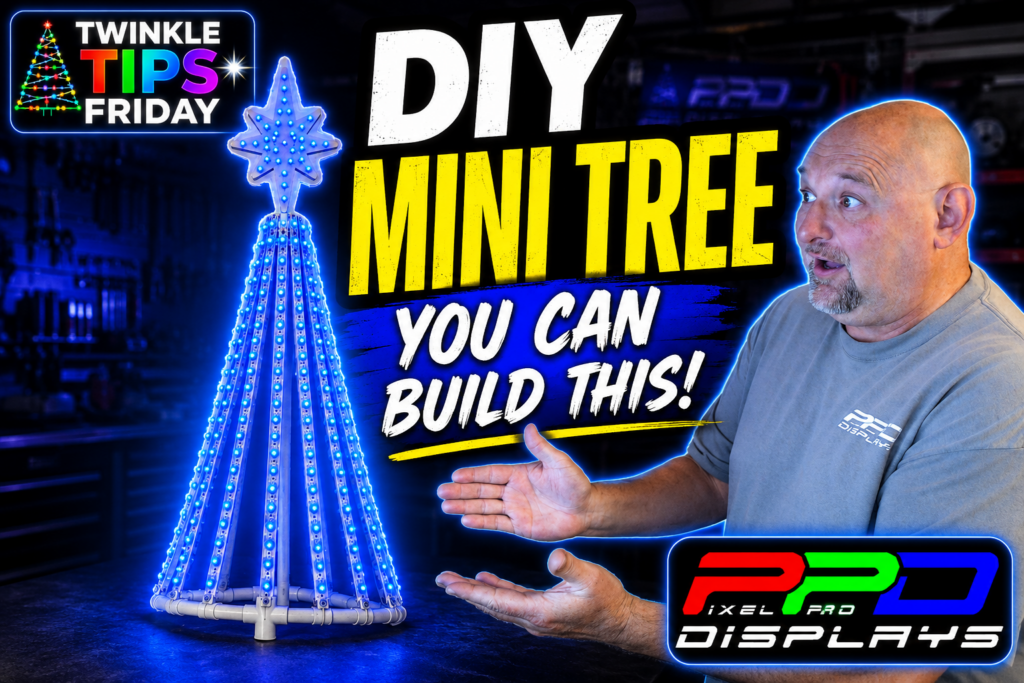
1. What Is a DIY Pixel Mini Mega Tree?
A DIY Pixel Mini Mega Tree is a smaller version of the large pixel mega trees commonly used as centerpieces in animated Christmas light displays. It uses vertical strands of individually controlled RGB pixels arranged around a center mast to create the familiar Christmas tree shape.
Calling this one a mini tree might be stretching the definition a little. At around six feet tall, it's nearly as tall as I am! That's why I tend to call it a Mini Mega Tree. It's large enough to create some great effects in xLights, but still small and lightweight enough to move, store, and use as an accent prop in different areas of the display.
From 150 Pixels to 200 Pixels
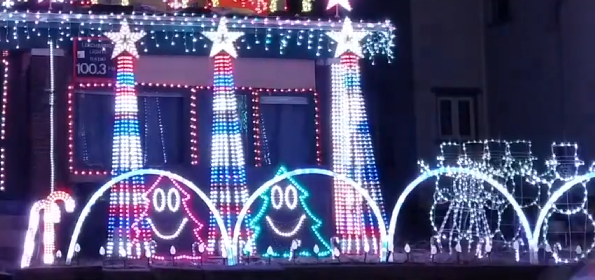
I originally built these trees back around 2015 using six strips with 150 total 5V pixels at 3-inch spacing. Pixels were more expensive at the time, so spreading them farther apart allowed me to build a larger prop without using as many pixels.
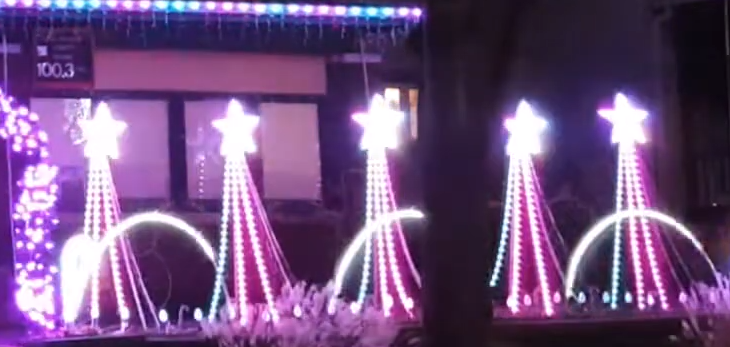
Eventually, my display changed and these trees were removed from the show. They went into storage around 2017 and hadn't been used since. Instead of throwing away a perfectly good project, I decided it was finally time to bring them back and improve the original design.
The redesigned DIY Pixel Mini Mega Tree now uses eight vertical strips with 200 total 5V pixels at 2-inch spacing. The additional strips and closer pixel spacing give the tree considerably more density than the original version while still allowing me to reuse many of the parts I already had.
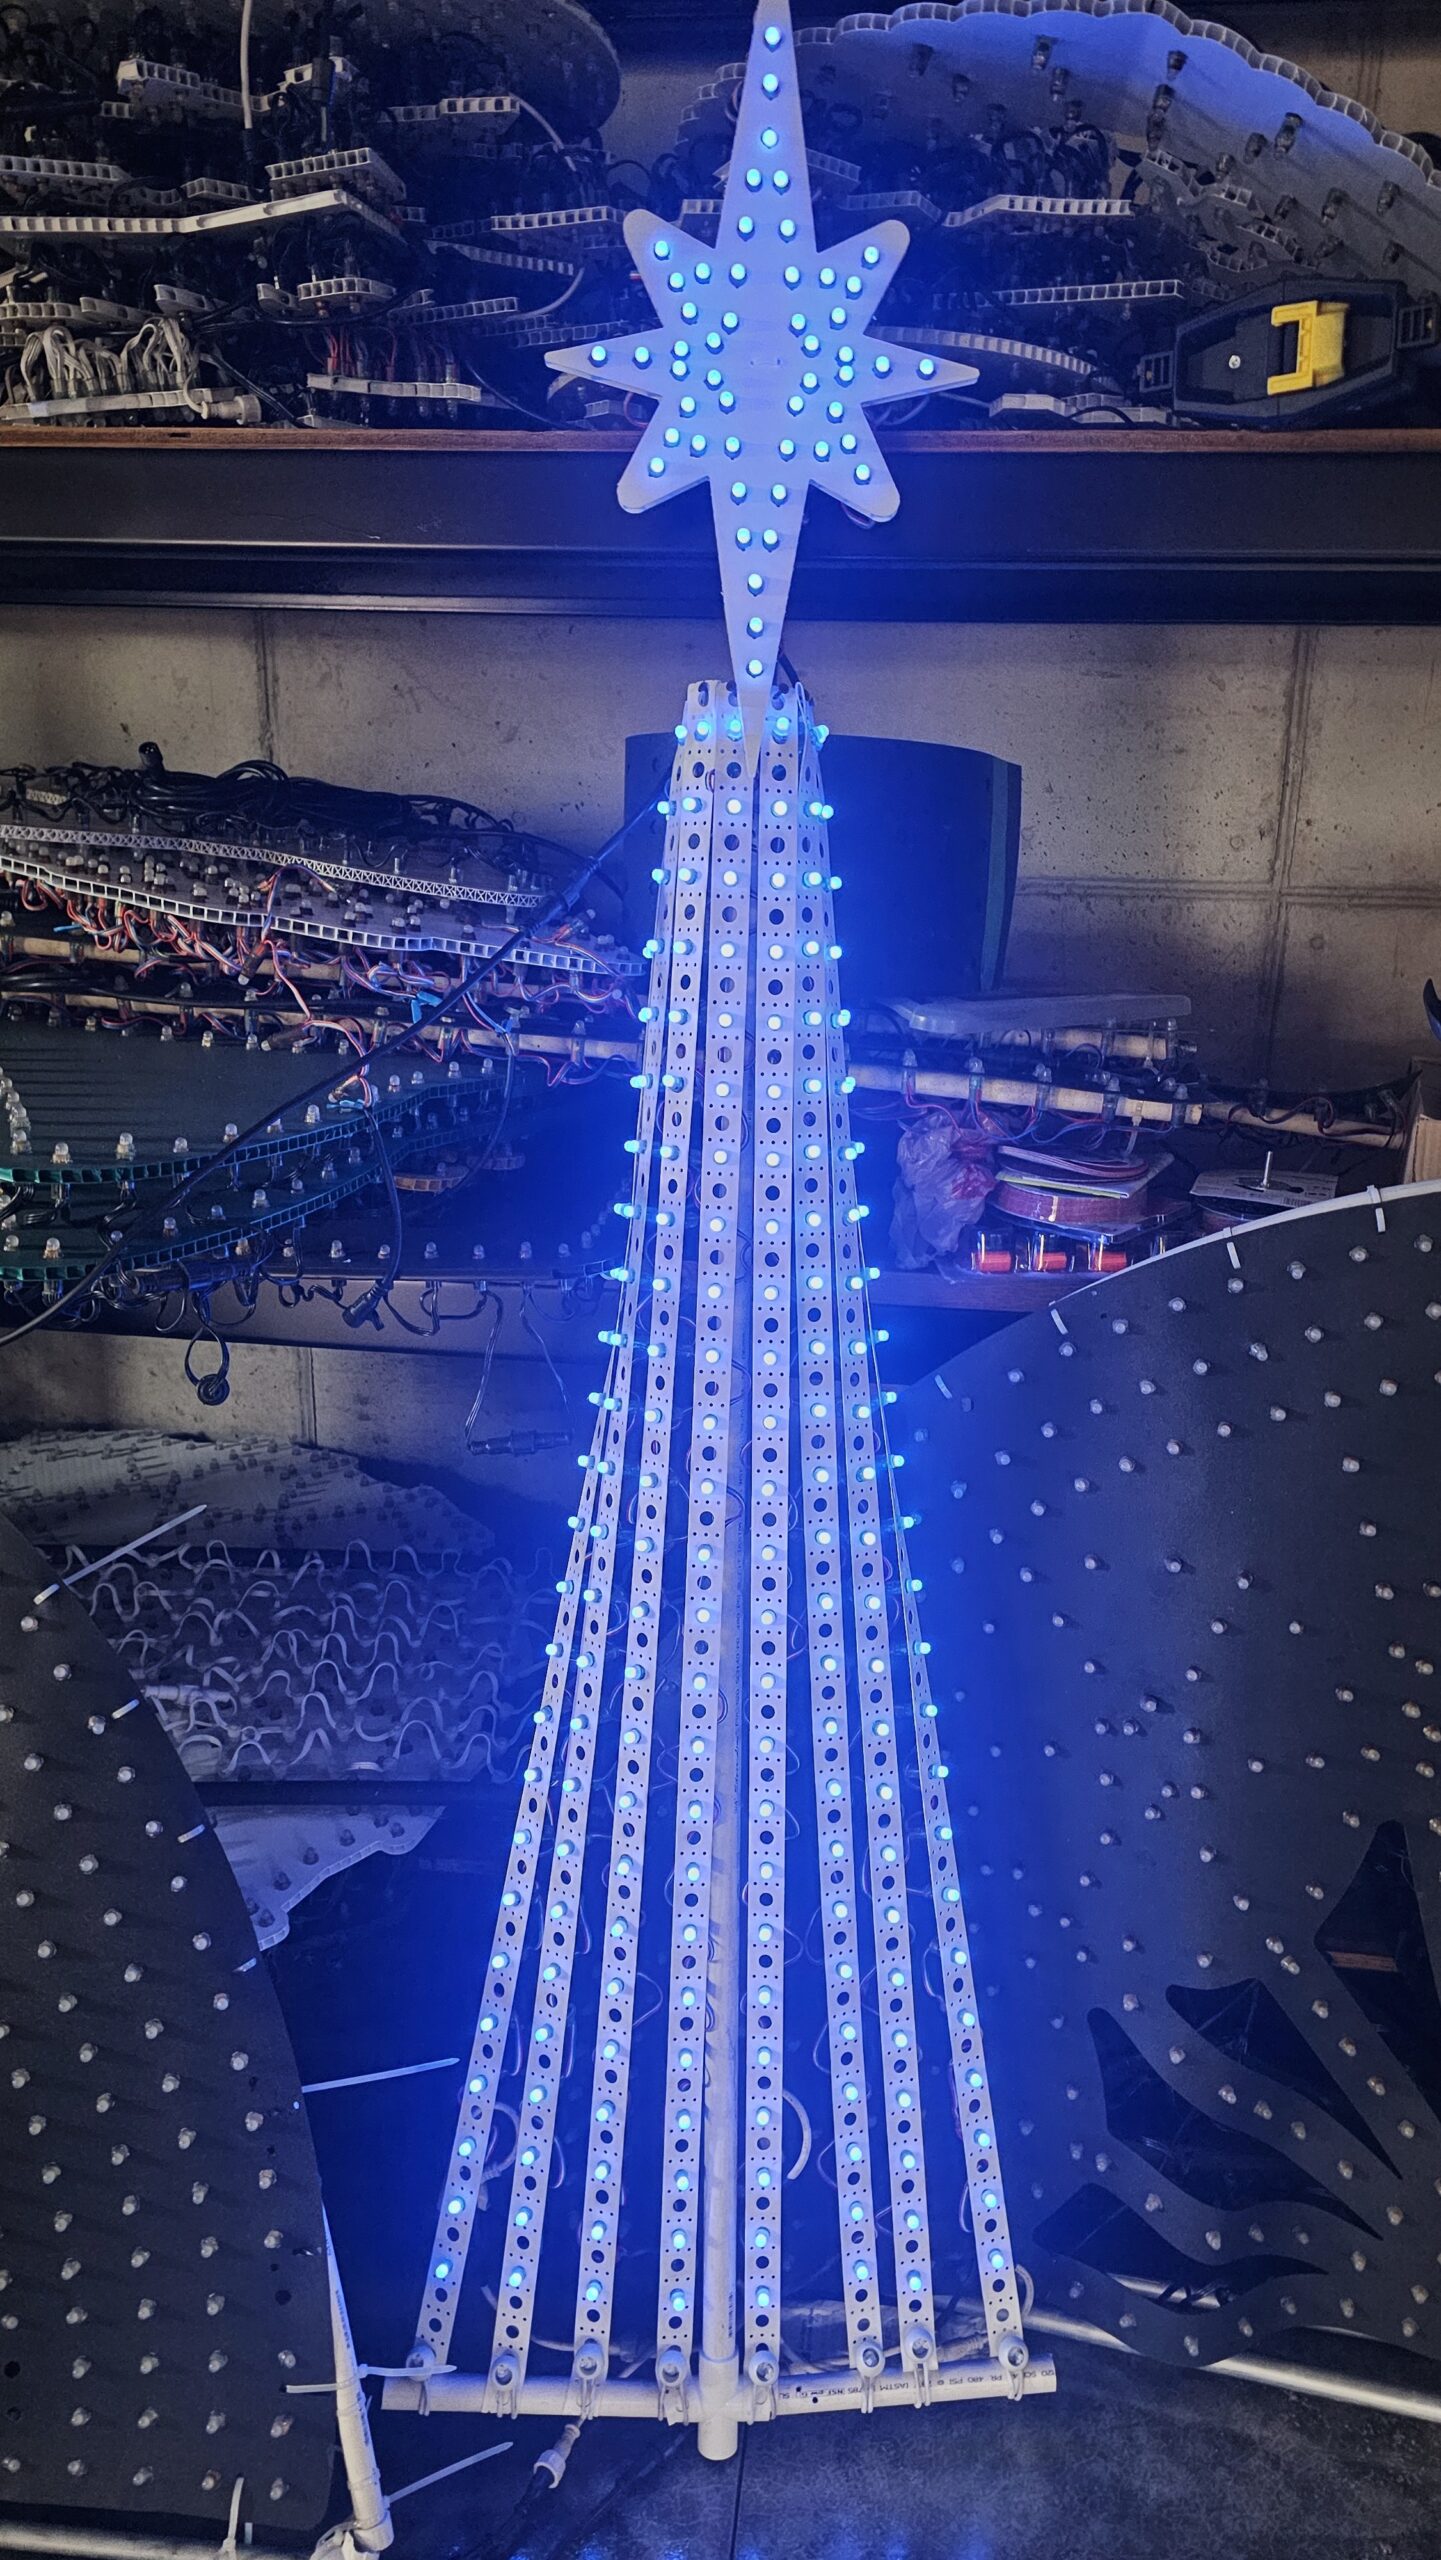
I also added a 50-pixel Bethlehem Star to the top, turning a fairly simple pixel tree into a more complete Christmas display prop.
A Simple Pixel Prop You Can Build Yourself
One of my favorite things about this project is that the frame doesn't require anything particularly complicated. The basic structure is made from PVC pipe and fittings, a few screws, bungee balls, and a short piece of EMT used to support the star.
Even better, much of what I needed was already sitting in my shop.
That's really the bigger lesson behind this build. As our displays change over the years, it's easy to end up with old props and good components packed away in storage. Sometimes, instead of buying everything new, you can take what you already have, make a few improvements, and turn it into a prop you're excited to put back into your show.
In the next section, we'll look at the original Mini Mega Trees and what I wanted to change before rebuilding them.
DIY Pixel Mini Mega Tree Build Specifications
| Component | Our Build |
|---|---|
| Center Mast | 50.5" PVC |
| Base Arms | 10" each |
| Base Connector | 3/4" PVC Cross |
| Topper | 3/4" to 2" PVC Coupler |
| Pixel Strips | 8 |
| Pixels per Strip | 25 |
| Tree Pixels | 200 |
| Pixel Spacing | 2" |
| Tree Outputs | 2 × 100 pixels |
| Star | 50-pixel Bethlehem Star |
| Star Support | Approx. 2' of 1/2" EMT |
| Voltage | 5V |
| Total Prop Pixels | 250 |
2. Rebuilding My Original Pixel Mini Mega Trees
This DIY Pixel Mini Mega Tree project actually started many years ago. I originally built four of these trees around 2015 for my Christmas display. At the time, each tree used six vertical strips with 150 total 5V pixels spaced approximately three inches apart.
The original design worked, but it wasn't perfect.
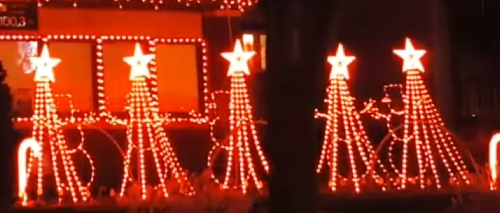
Each pixel strip hung from screws mounted around the topper. At the bottom, I used ground anchors to stretch the strips out and hold them in place. The idea was simple and inexpensive. However, the anchors had one major problem: wind could pull them out of the ground.
The trees did their job, but I could always see some of these strips sagging. Eventually my display changed.
Nine Years in Storage
Around 2016 and 2017, the front of my light show was redesigned. As a result, these Mini Mega Trees no longer had a place in the new layout. I packed them away, thinking I would eventually find another use for them.
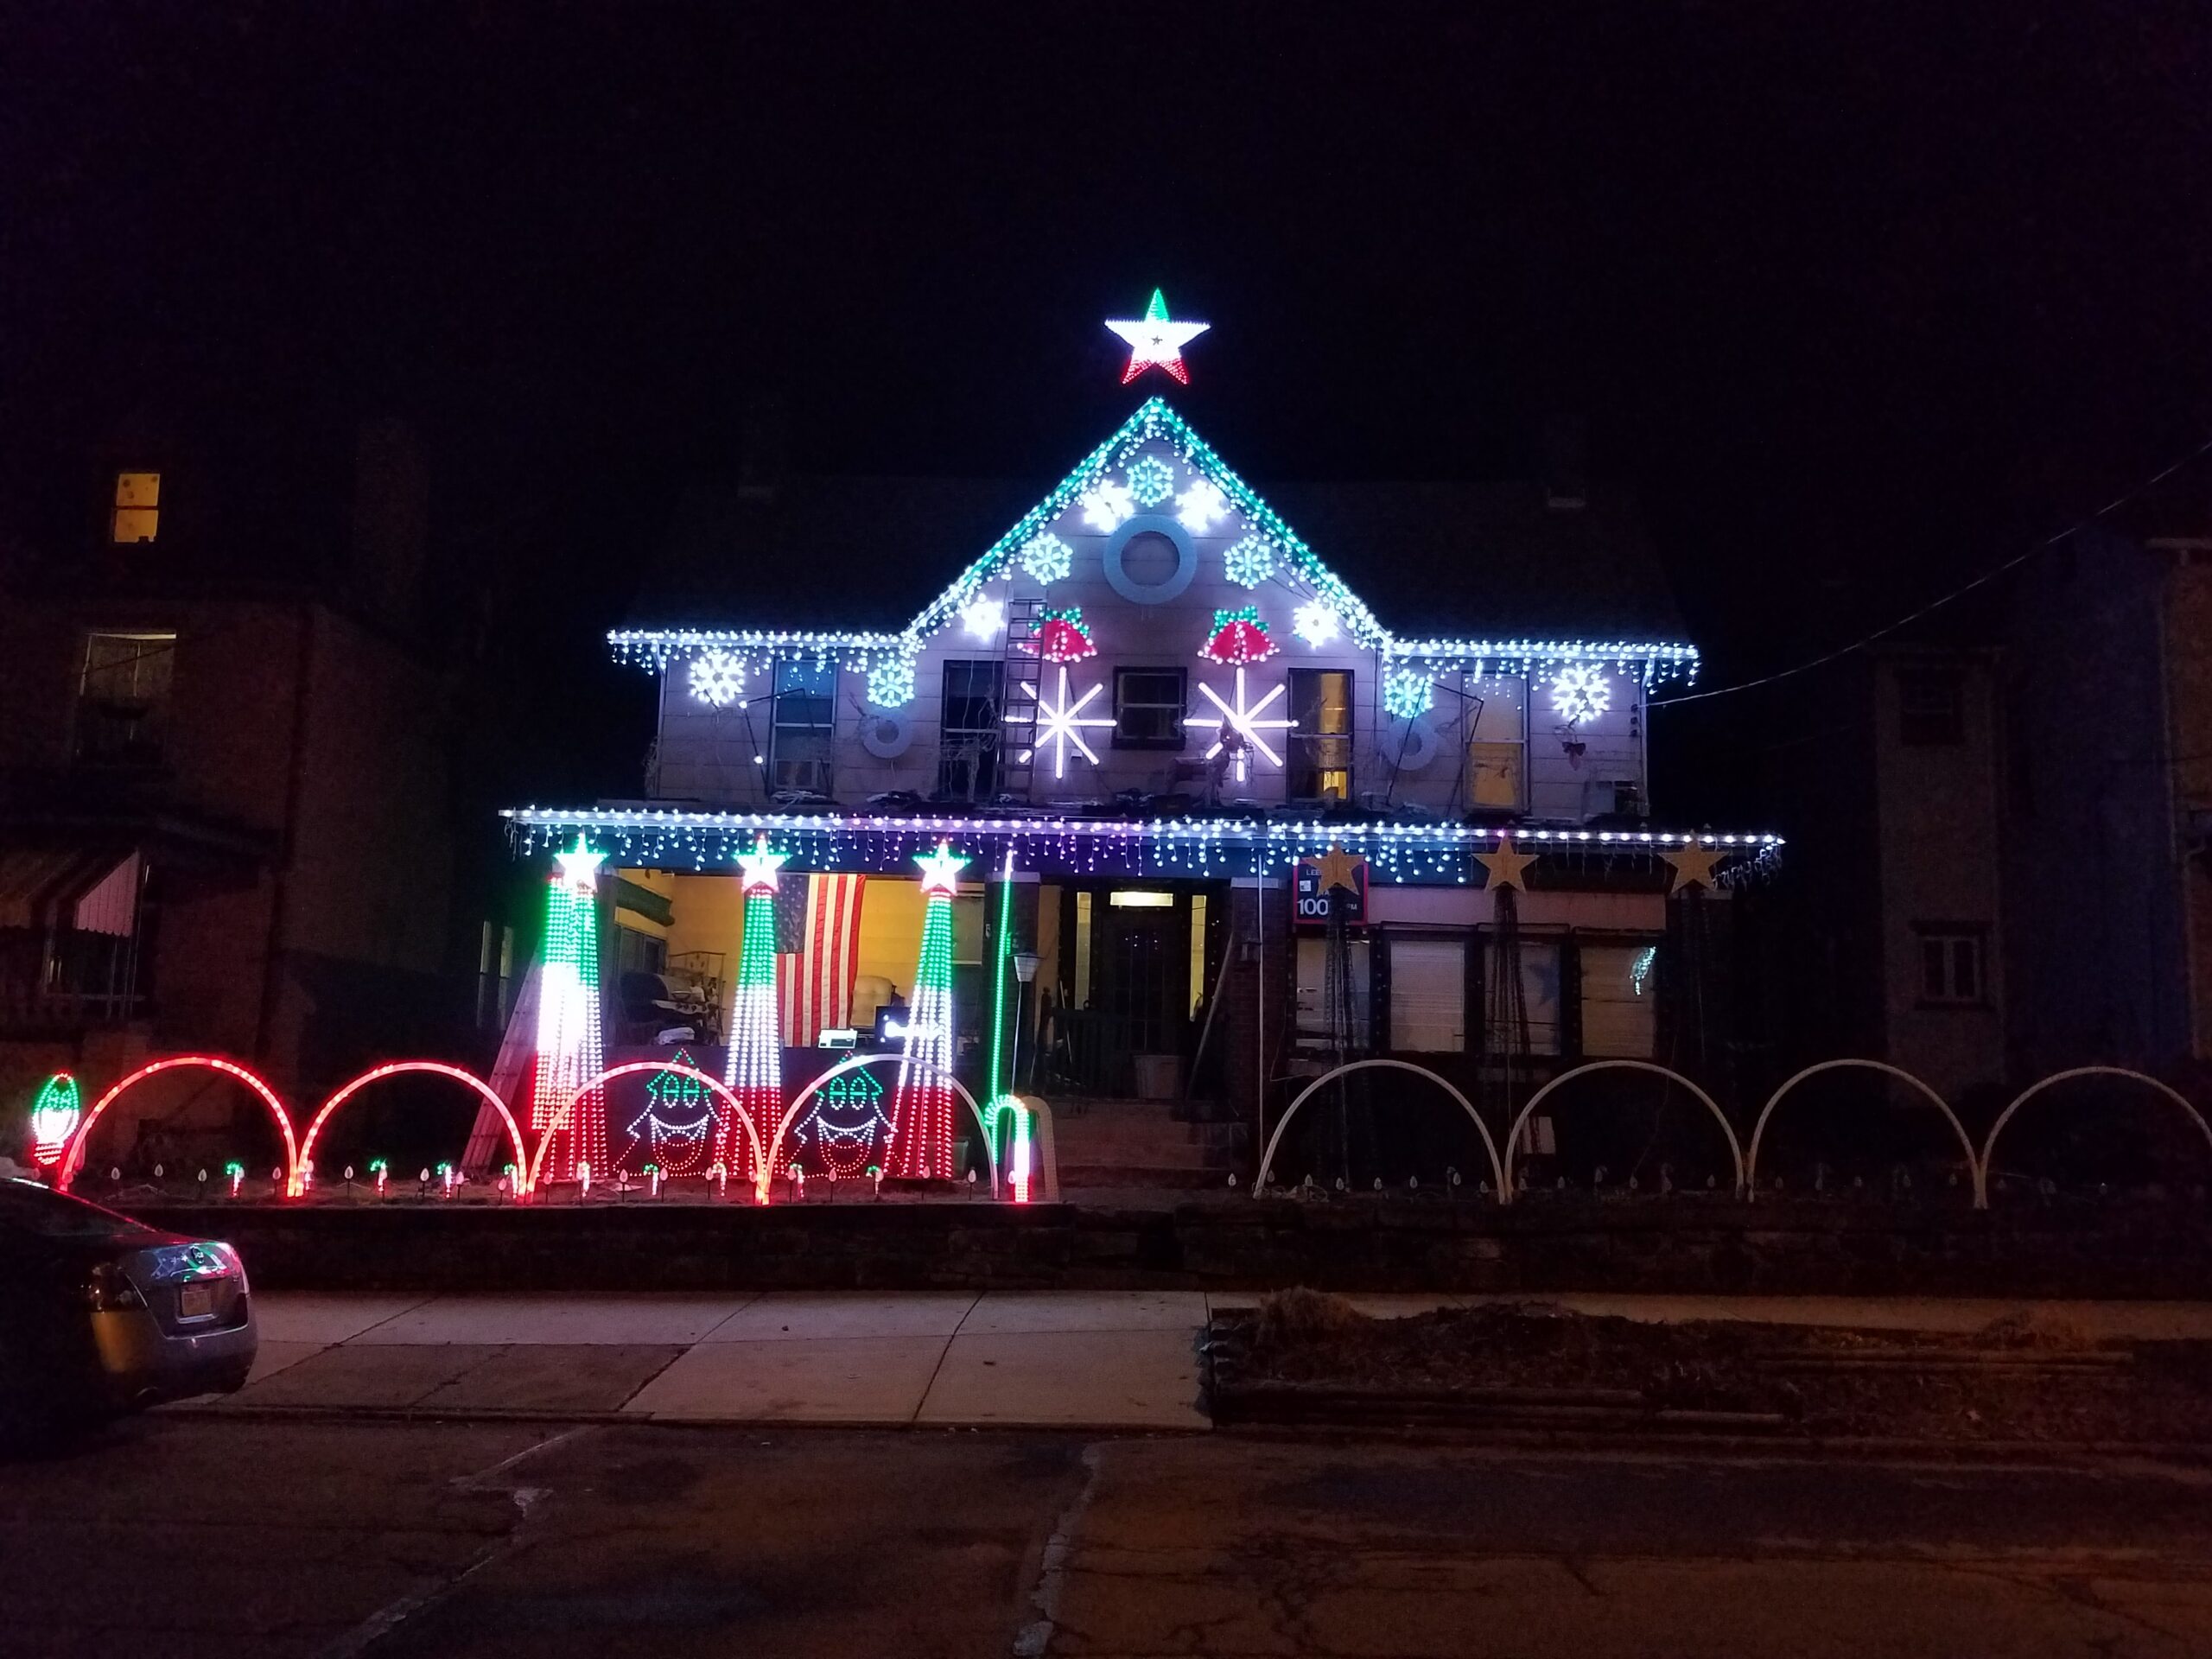
Instead, they sat in storage.
And sat.
And sat some more.
The pixels hadn't even been powered on for roughly nine years when I finally pulled the trees back out for this project.
Fortunately, there was no reason to throw everything away and start over. The PVC structure, pixel strips, and many of the other components could still be reused.
Improving the Original DIY Pixel Mini Mega Tree
This time, I wanted to fix some of the weaknesses of the original design, simplify the setup, and also improve how the tree looked.
The biggest change was pixel density.
The original trees had six strips and 3-inch pixel spacing. The rebuilt version uses eight strips with 2-inch spacing, bringing each tree up to 200 pixels. This gives xLights more pixels to work with and creates a fuller-looking prop.
Previously, the tree was 6 strips wide by 25 pixels tall. That was roughly 75 inches in length
Pulling the pixels from the strips and re-pushing them at 2-inch spacing makes a whole lot of difference. Then increasing the width to 8 strips, was like icing on the cake.
I also changed how the strips attach at the bottom. Instead of relying on individual ground anchors, the new design uses a PVC base with two arms. Bungee balls connect the pixel strips to those arms, helping maintain the shape and tension of the tree.
Finally, I added a 50-pixel Bethlehem Star above the tree to finish the prop.

The result is still based on my original design, but it's a more taut and neat version of it.
More importantly, rebuilding these trees allowed me to take something that hadn't been part of my display in years and give it another purpose.
🎥 Watch the Complete DIY Pixel Mini Mega Tree Build
Next, we'll look at the parts and materials used to build the updated DIY Pixel Mini Mega Tree.
3. What You'll Need to Build a DIY Pixel Mini Mega Tree
One of the things I like most about this DIY Pixel Mini Mega Tree is how simple the basic frame really is. You don't need a complicated metal structure or a collection of specialty hardware to build one.
In my case, I was able to reuse many of the parts from the original trees. However, most of the materials are inexpensive items you can find at a local hardware store or order online.
DIY Pixel Mini Mega Tree Materials
For each tree, I used:
- 3/4-inch PVC pipe for the center mast and base arms
- 3/4-inch PVC Cross Connector fitting
- 2-inch to 3/4-inch PVC reducer for the topper
- Eight pixel mounting strips
- 200 5V pixels at 2-inch spacing
- Eight screws for the strip attachment points
- White bungee balls
- 50-pixel Boscoyo Bethlehem Star
- Approximately 2 feet of 1/2-inch EMT for the star support
- Zip ties for attaching the star to the EMT
- Screws for securing the star support to the tree
You'll also need a few basic tools, including a tape measure, marker, drill, and something to cut the PVC. I used PVC cutters, which made it easy to make the relatively small number of cuts required for each tree.
Reuse What You Already Have
Before buying everything on the list, take a look around your shop.
The 5V pixels used in my stars were leftovers from other projects. I already had sections of EMT cut to the length I needed, and much of the PVC structure came directly from my original trees.
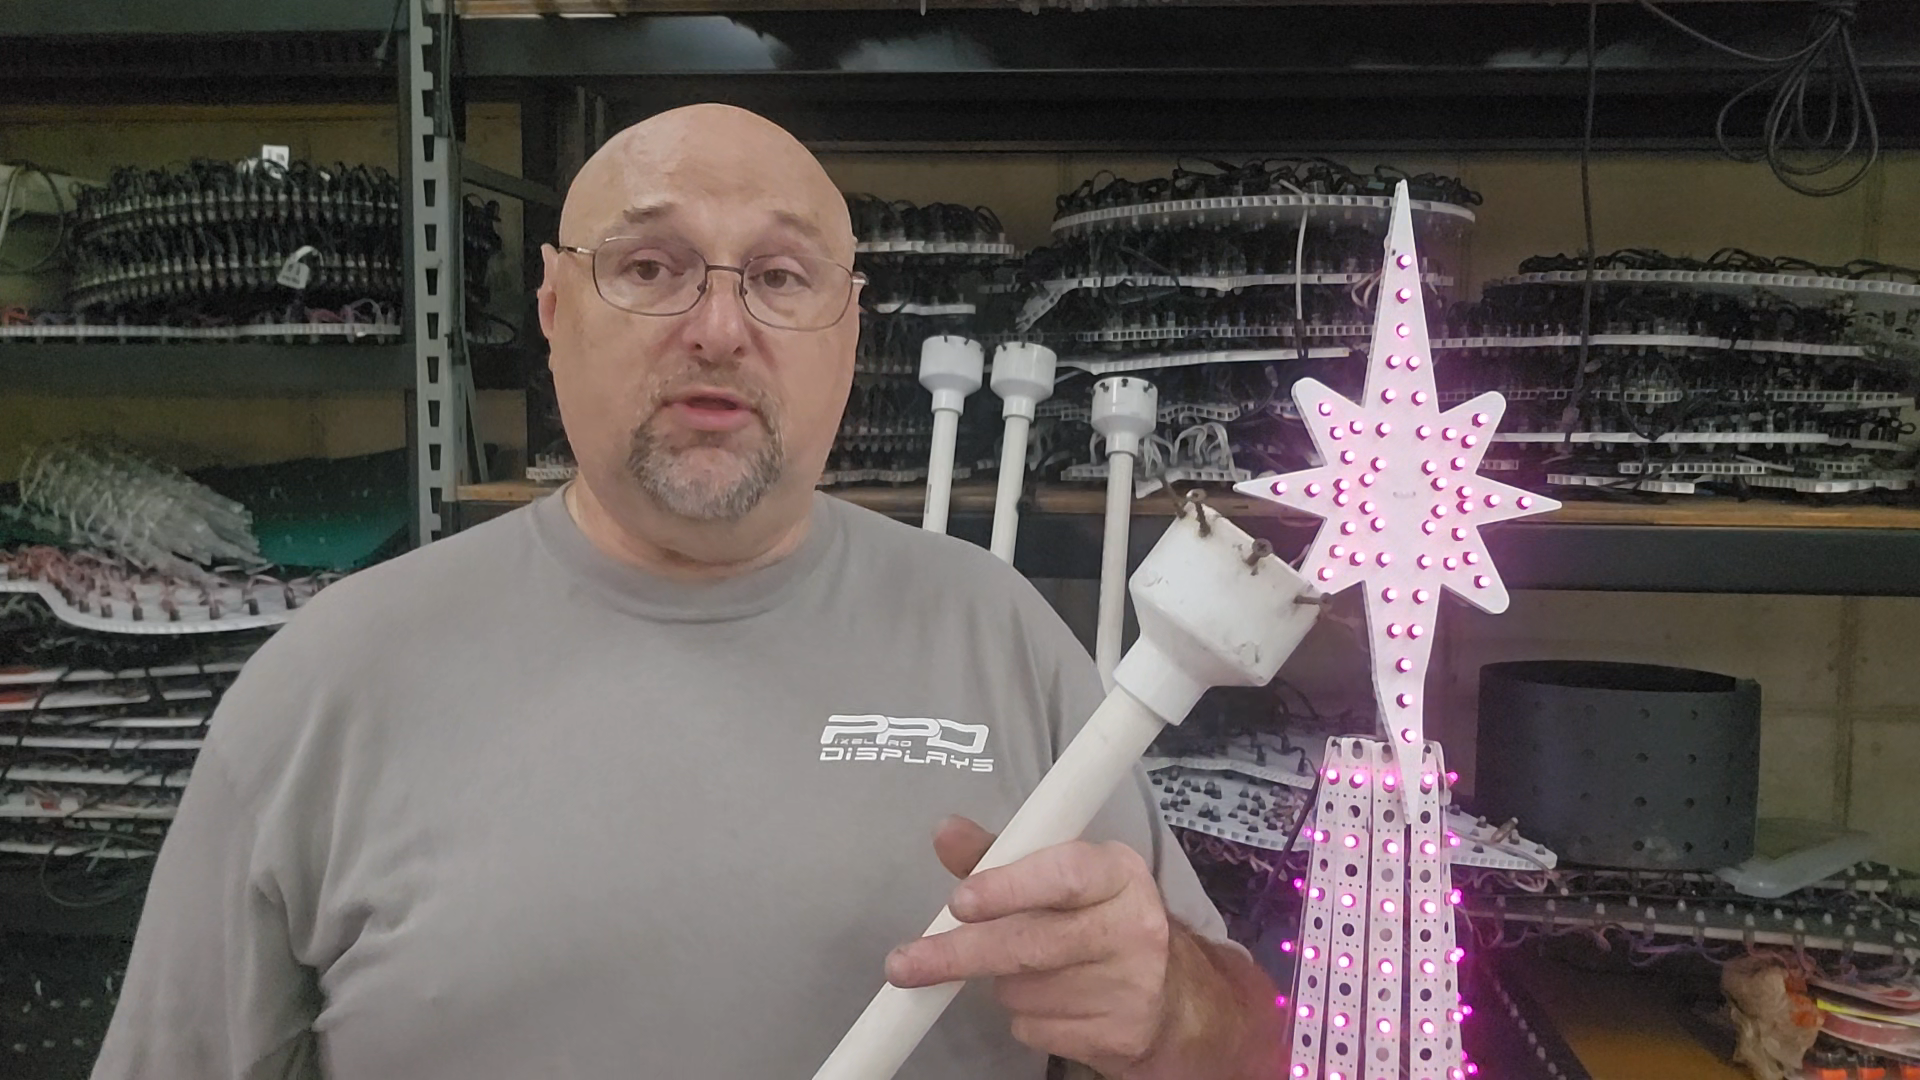
That's part of what made rebuilding these props worthwhile. You may already have pixels, PVC, mounting strip, wire, or other hardware left over from previous projects that can be put back to work.
Even if you're starting from scratch, the frame itself uses only a handful of basic components.
With our materials together, the next step is getting the measurements for the DIY Pixel Mini Mega Tree and cutting the PVC for the frame.
4. DIY Pixel Mini Mega Tree Measurements
Before building the remaining trees, I took one of my completed DIY Pixel Mini Mega Trees apart so I could measure each piece and duplicate the frame. If you're working from an existing prop like I was, this is an easy way to recreate a design that you already know works.
Ironically, once I started taking everything apart, I discovered that I had written the measurements directly on the PVC years ago. I had completely forgotten about that! At least tearing it apart gave me a chance to double-check everything and show you how the frame goes together.
Center Mast Measurement
The main center mast measures 50 1/2 inches long.
Since I already had one center mast cut to the correct length, I used the original piece as a template. I simply placed it alongside the new PVC, marked the cut, and duplicated the same measurement for each additional tree.
Using an existing piece as a template is also a great way to keep several identical props consistent.
Bottom Arm Measurements
After cutting the 50 1/2-inch center mast, I used the remaining PVC to make the two arms at the bottom of the tree.
Each bottom arm measures:
10 inches long
The two 10-inch arms connect to either side of a 3/4-inch PVC T fitting, while the center mast extends vertically from the remaining opening in the T.
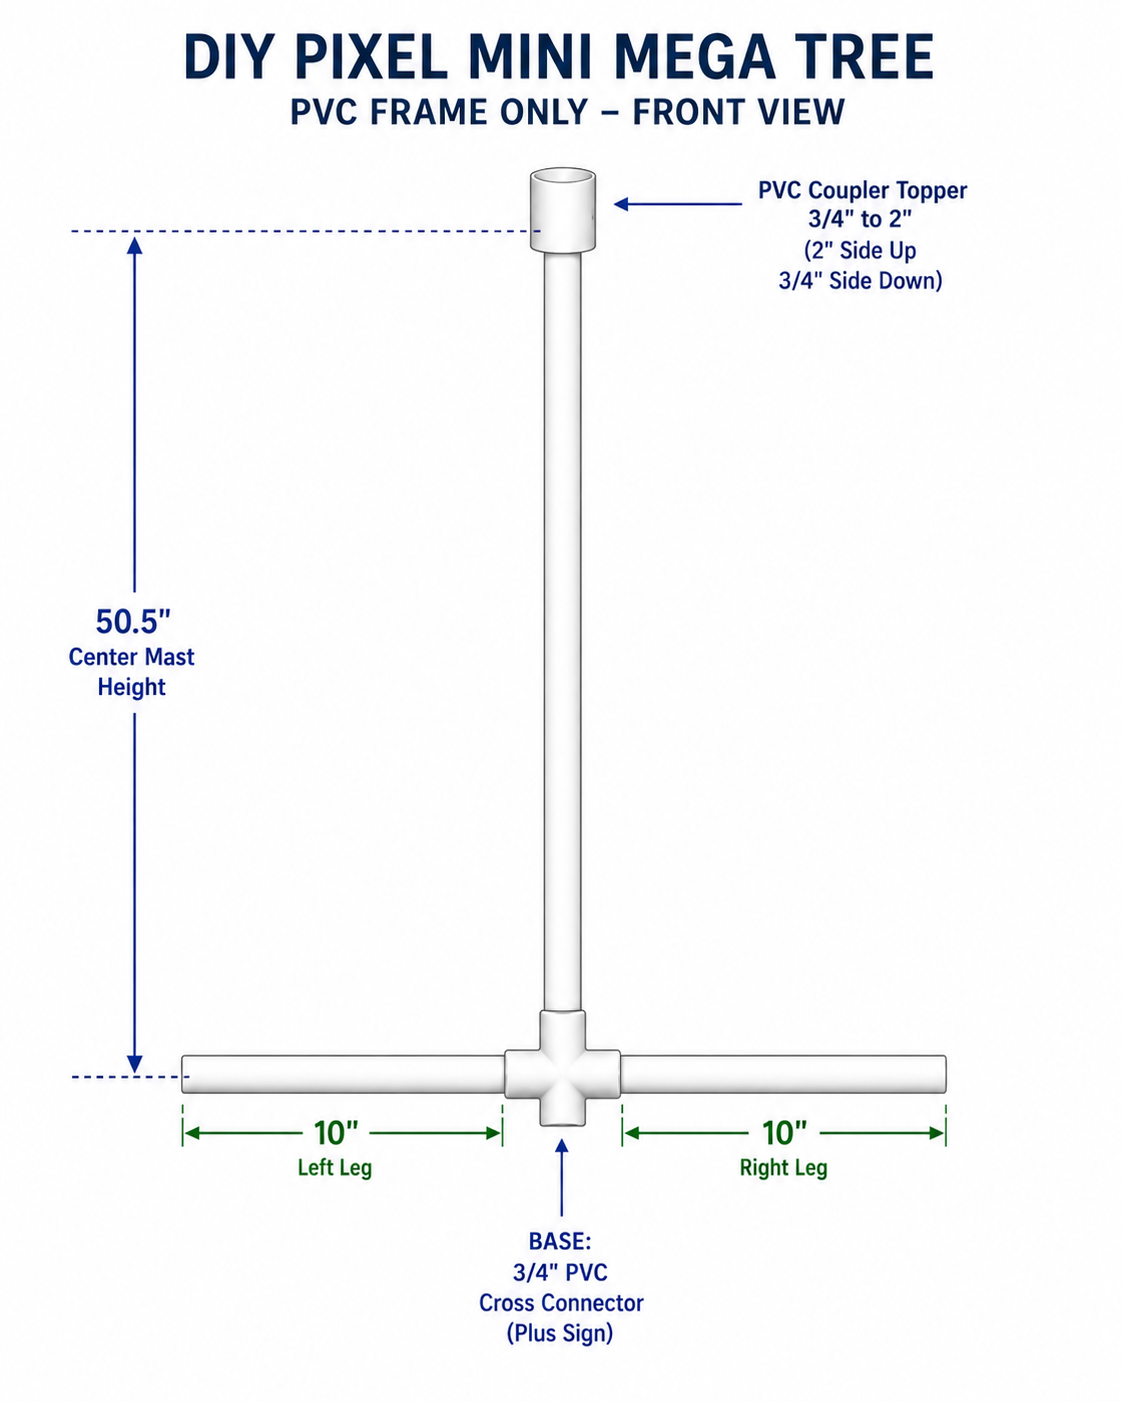
Those arms provide the attachment points for the pixel strips at the bottom of the tree. Instead of staking each strip individually into the ground like I did with my original design, the rebuilt tree uses bungee balls to connect the strips to this PVC base.
Basic PVC Cut List
For each DIY Pixel Mini Mega Tree, the primary PVC pieces are:
- 1 center mast: 50 1/2 inches
- 2 bottom arms: 10 inches each
- 1 PVC Cross Connector: 3/4 inch
- 1 topper: 2-inch to 3/4-inch PVC reducer
The star uses a separate piece of EMT, which we'll cover when we add the Bethlehem Star later in the build.
Once the PVC pieces are measured and cut, assembling the basic frame only takes a few minutes. Next, we'll connect the center mast, base arms, and topper to create the structure for our pixel strips.
5. Building the PVC Mini Mega Tree Frame
With all of the PVC cut to size, assembling the frame for the DIY Pixel Mini Mega Tree is pretty simple. There are only a few pieces, and the frame can be put together without building a complicated support structure.
Start with the 3/4-inch PVC cross connector at the bottom. The 50 1/2-inch center mast slides into the top of the cross, while the two 10-inch PVC legs extend from the left and right sides.
The fourth opening in the cross faces downward. This gives us a true four-way cross rather than the PVC T fitting I mistakenly called it a few times in the video.
Adding the PVC Topper
At the top of the center mast, install the 3/4-inch to 2-inch PVC coupler.
The orientation matters:
- 3/4-inch side faces down and connects to the center mast.
- 2-inch side faces up and becomes the wider portion of the topper.
Around this wider section, I use eight screws spaced around the coupler. Each screw becomes an attachment point for one of the eight pixel mounting strips.
You don't need to make the spacing absolutely perfect. However, keeping the screws reasonably even around the topper helps spread the strips and gives the finished tree a more consistent shape.
Why I Changed the Bottom of the Frame
My original Mini Mega Trees didn't have the two PVC legs we're using today. Instead, the pixel strips came down from the topper and were stretched outward using individual stakes in the ground.
It worked, but wind could loosen or pull those stakes out.
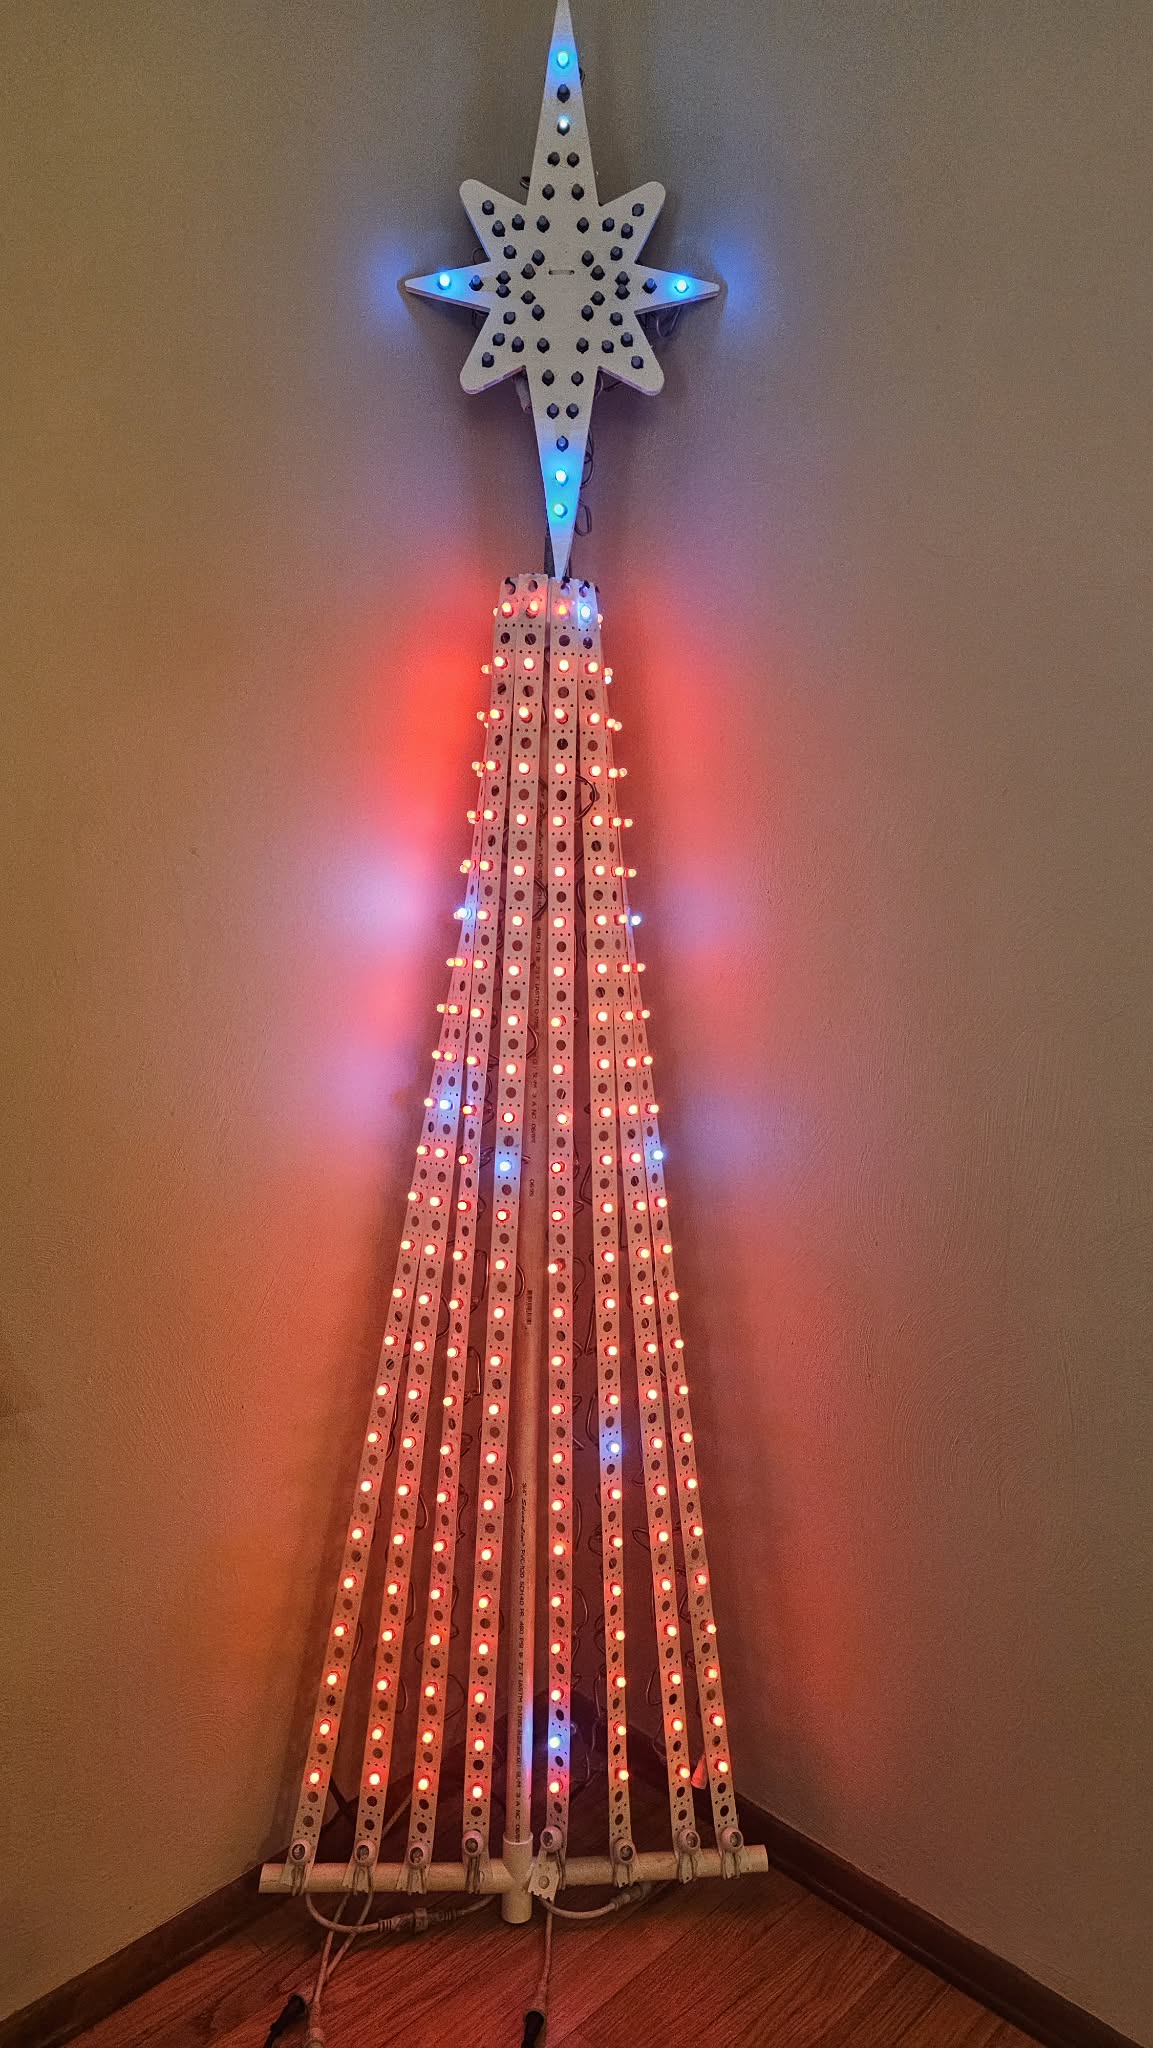
The updated DIY Pixel Mini Mega Tree keeps the bottom attachment points as part of the prop itself. The two 10-inch PVC legs give me a place to secure the strips with bungee balls while also helping keep the tree's shape consistent.
It also makes the prop easier to move and store. Instead of recreating the shape every time I set it up, the structure stays together, with extension cords, even when stored in the off-season.
Don't Glue Everything Together Yet
One thing to consider before reaching for the PVC cement is storage.
A permanent PVC frame may be convenient during show season, but it can become awkward when it's time to put everything away. Leaving some connections removable lets you break the DIY Pixel Mini Mega Tree into smaller pieces for storage or transportation.
How permanent you make the frame is really up to you and how you plan to use the prop. I have storage that will fit my tree, complete without having to break it down at the end of the season. Your results may vary.
Once the center mast, cross connector, bottom legs, and topper are assembled, the basic PVC frame is complete.
Now we can start turning that simple PVC frame into a pixel tree by adding the eight mounting strips.
6. Adding Pixel Strips and Wiring the Tree
Now that the PVC frame is assembled, it's time to add the pixel mounting strips and start giving our DIY Pixel Mini Mega Tree its shape.
For my rebuild, I'm using eight vertical strips with 200 total 5V pixels. Each strip contains 25 pixels at 2-inch spacing. That gives me four strips on the left side of the tree and four on the right.
However, this is also the point in the build where you can make this tree your own.
Attaching the Pixel Strips
At the top of the tree, each mounting strip attaches to one of the eight screws installed around the PVC coupler. At the bottom, I use white bungee balls to connect the strips to the PVC base.
The bungee balls do two things. First, they hold the strips in position. More importantly, they provide some tension while still allowing the strips to move slightly instead of being pulled completely rigid.
When attaching the strips, I like to work back and forth across the tree rather than completely finishing one side first. This helps keep the tension more balanced as the tree begins taking shape.
You want the strips tight enough to stay straight. Move your bungee ball to a lower hole on the strip if it's too hard to attach around the PVC arm. The goal is a clean tree shape without putting unnecessary stress on the mounting strip, pixels, or PVC frame.
Wiring My 200-Pixel Mini Mega Tree
I'm using two strings of 100 5V pixels for this build. Each controller output runs one half of the tree.
From the front view, Output 1 starts at the bottom left side of the tree. The pixels travel up the first strip, cross over at the top, travel down the second strip, cross at the bottom, travel up the third strip, and finally cross at the top and travel down the fourth strip.
That gives us one continuous 100-pixel zigzag:
Up → Down → Up → Down
Output 2 follows the same pattern on the right side of the tree. It begins near the center mast at the bottom and zigzags across the remaining four strips.
This gives each controller output:
4 strips × 25 pixels = 100 pixels
And the complete DIY Pixel Mini Mega Tree has:
8 strips × 25 pixels = 200 pixels
DIY Pixel Mini Mega Tree Wiring Diagram
This is much easier to understand when you can actually see it:
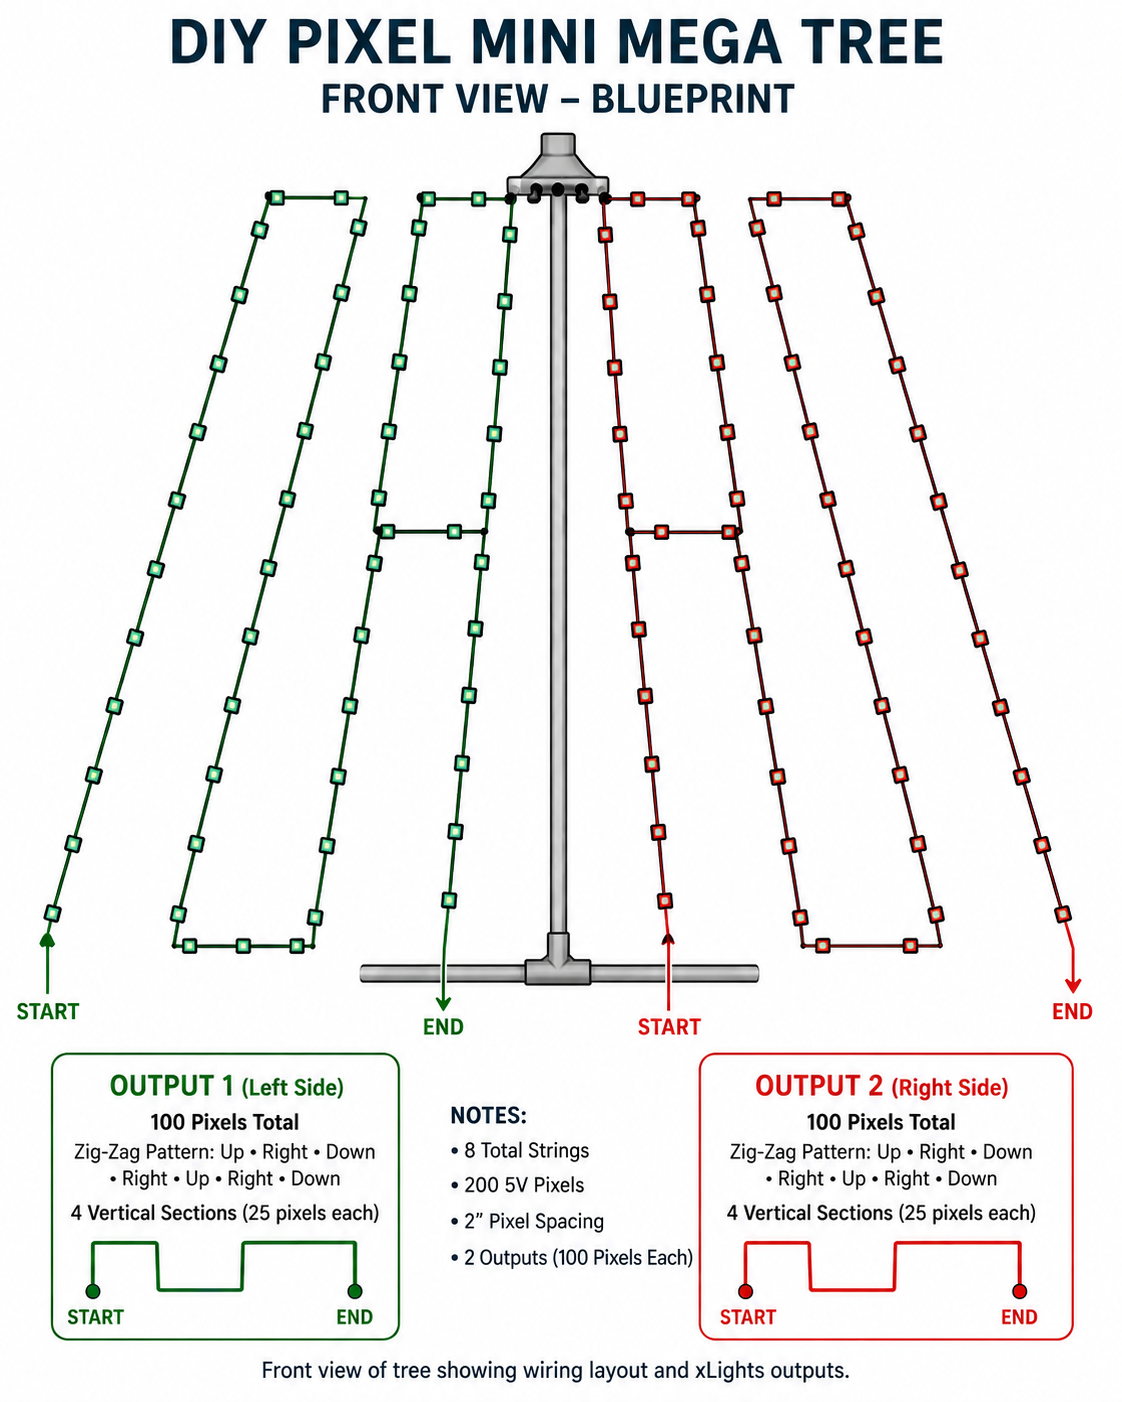
The diagram shows the tree from the front and identifies the START and END of both 100-pixel strings. This will also become important when we configure the tree in xLights later.
You Don't Have to Build Mine Exactly Like Mine
Here's where I want to emphasize something: 200 pixels isn't a requirement.
It's simply what I'm using.
If you're building your own DIY Pixel Mini Mega Tree, this is a great place to adjust the design based on the pixels, mounting strips, controller outputs, and supplies you already have.
For example, instead of eight strips, you could build the tree with 10 strips of 25 pixels. That would increase the tree to 250 pixels and give you additional density around the tree.
You could take it even further.
With approximately 52-inch mounting strips and 1-inch pixel spacing, you could use 10 strips with 50 pixels on each strip. Now you've created a much denser 500-pixel Mini Mega Tree using essentially the same basic PVC frame design.
Of course, adding more pixels also changes your power and controller requirements. Plan your controller outputs, power needs, pixel voltage, and wiring for the version you decide to build.
Build the Tree That Fits Your Display
That's one of the nice things about a simple DIY design like this. The PVC frame gives you the basic structure, but it doesn't lock you into one particular pixel count.
You can change the number of strips. You can change the pixel spacing. You can increase the pixel density. You can also adapt the wiring pattern to match the controller outputs you have available.
My version uses eight strips, 200 5V pixels, and two 100-pixel controller outputs because that's what made sense for the parts I already had.
Your DIY Pixel Mini Mega Tree doesn't have to be identical to mine. You may chose to use 12v pixels and run 200 pixel on a single output.
Use this build as the starting point, then adjust it to fit your display, your equipment, and the look you want to create.
7. Adding the Pixel Star
With the 200 pixels installed on the tree, the next step is adding the finishing touch to our DIY Pixel Mini Mega Tree: the star.
For this build, I'm using a Boscoyo Bethlehem Star with 50 5V pixels. I had several of these stars already assembled and sitting in storage, so once again, this was a good opportunity to reuse something I already owned instead of buying another prop. The star also gives the Mini Mega Tree a more finished look and adds another model we can control separately in xLights.
Building the Star Support
The star needs to sit above the PVC topper, so I use a piece of 1/2-inch EMT approximately 2 feet long as the support.
The EMT runs vertically behind the tree and extends above the PVC center mast. I attach the Bethlehem Star to the EMT using zip ties, which keeps the star centered while still making it easy to remove later.
We start by drilling 2 holes into the center of the star. These mounting holes will be used to route the zip ties around the EMT.
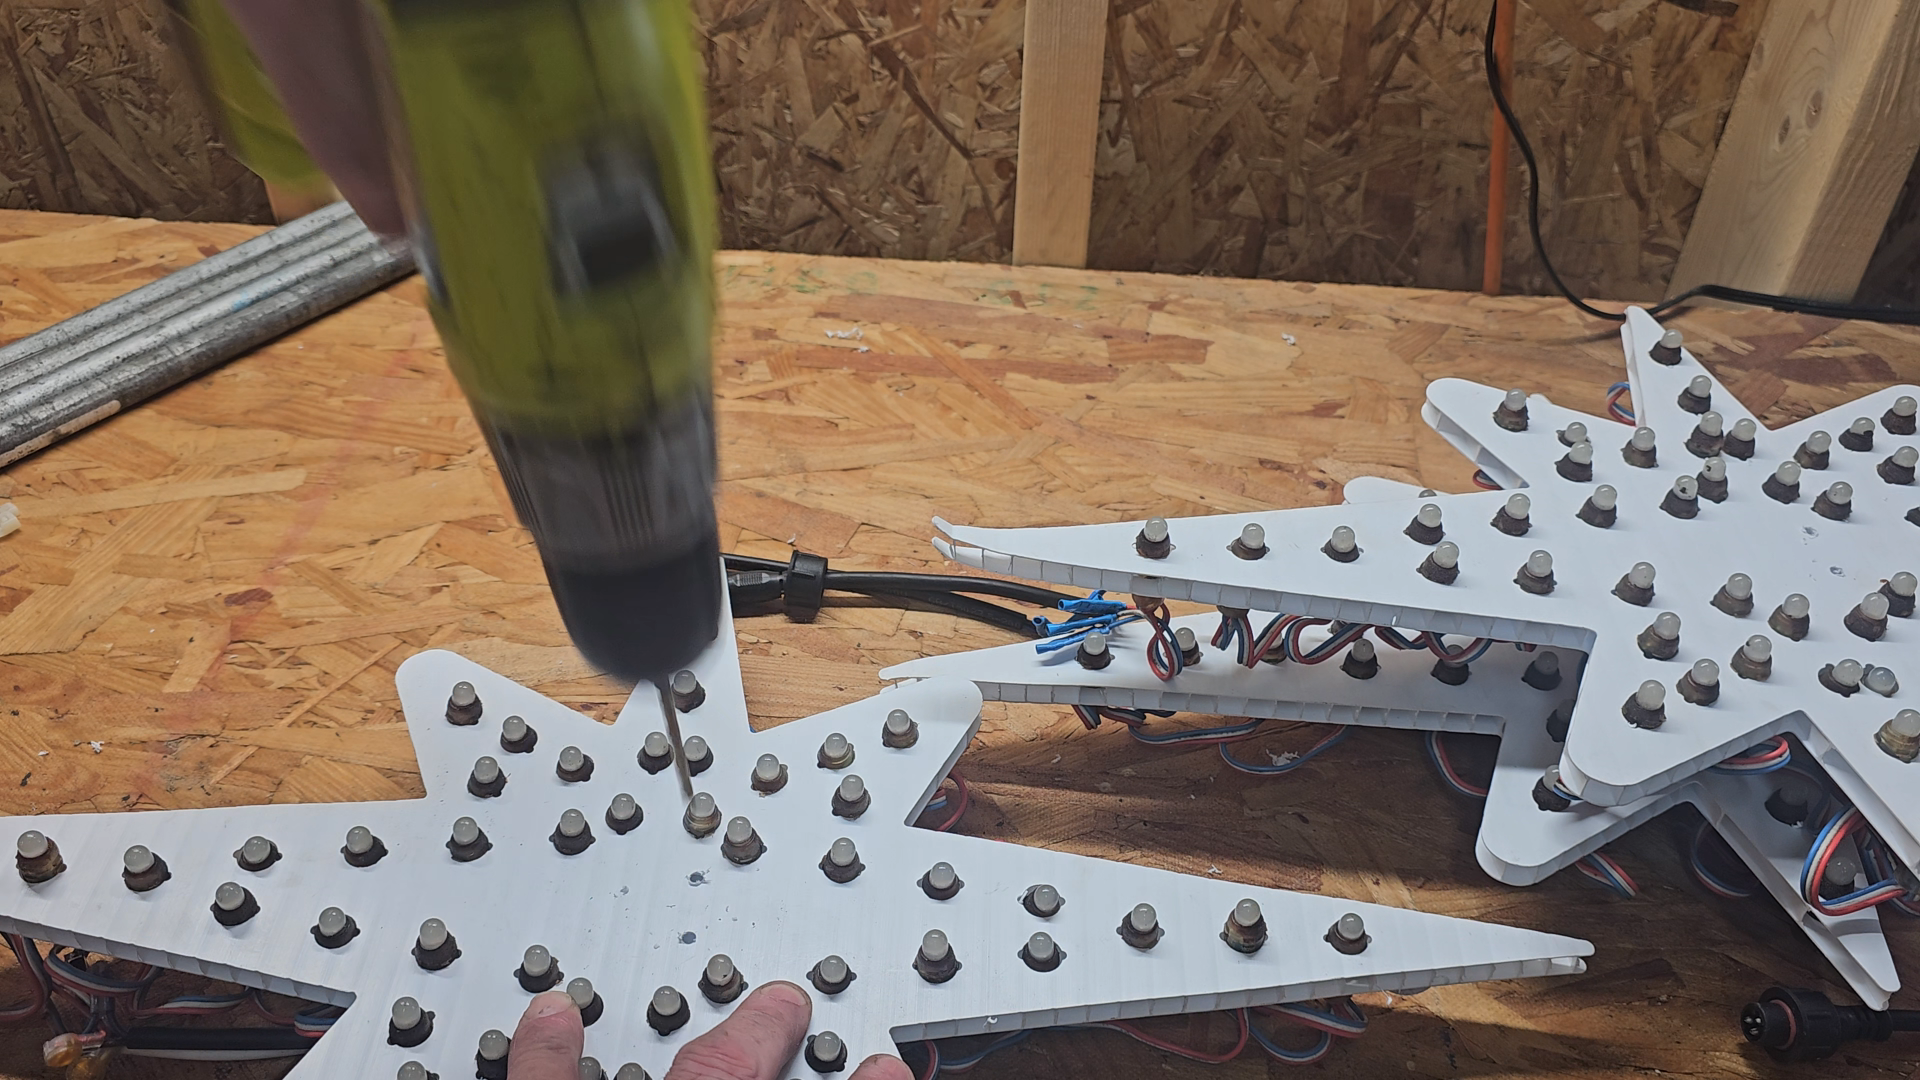
The EMT is then secured to the PVC frame with screws (not shown in the video). We will drill 2 holes in the coro star and secure it to the 1/2 inch EMT using a zip tie. Another zip tie secures the EMT lower on the coro star, through the flutes in the coro material. Using two attachment points keeps the support from rotating and helps the star remain upright.
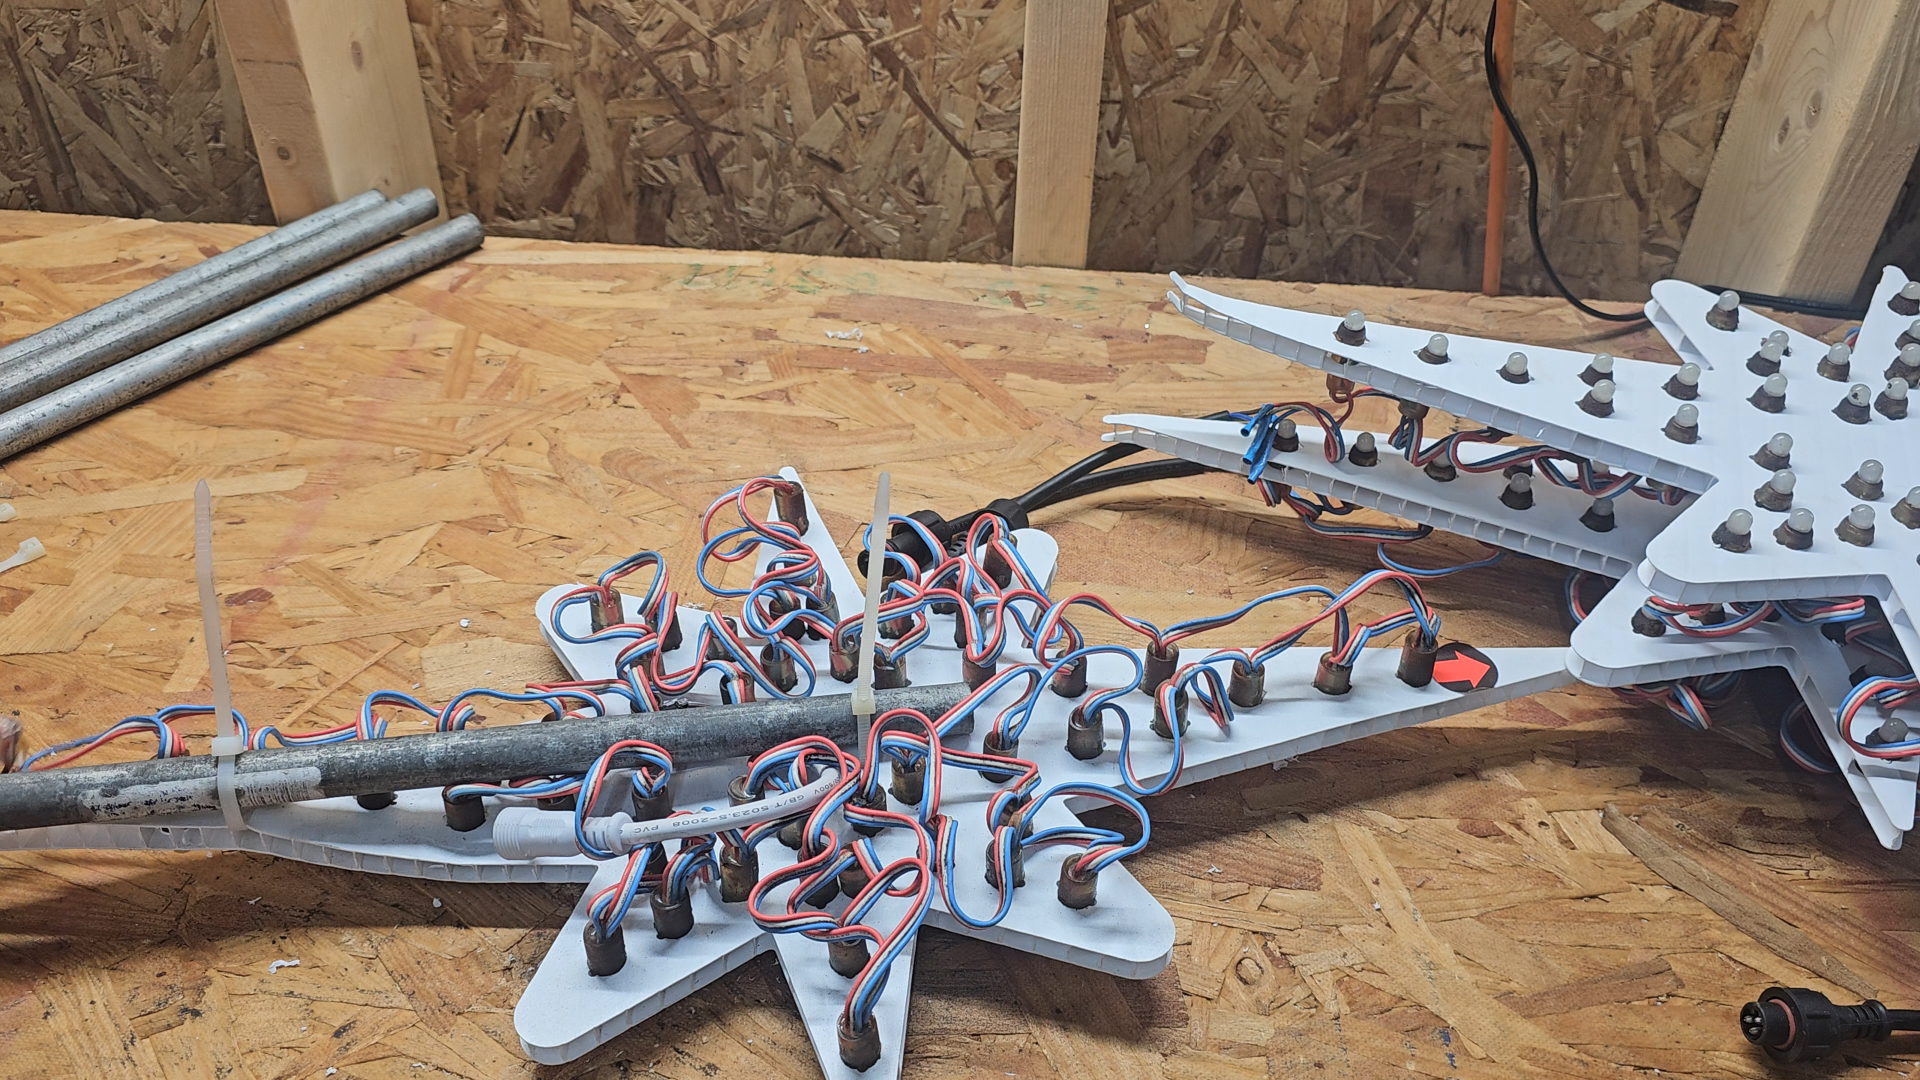
Before tightening everything completely, step back and look at the tree from the front. This is the easiest time to make small adjustments and get the star centered over the EMT.
Wiring the 50-Pixel Star
The Bethlehem Star uses 50 additional 5V pixels, bringing the complete prop to:
200 pixels in the tree + 50 pixels in the star = 250 total pixels
However, I treat the star as its own model rather than simply making it another part of the Mini Mega Tree.
That gives me much more flexibility when sequencing in xLights. The tree and star can work together when I want them to, but I can also apply completely different effects to each model.
Keep the Star Removable
Just like the PVC frame, I like having the ability to take things apart.
Perhaps in the future, a new star will be created and fit this build? How easy will it be to swap one star for a new style when it is attached to the same EMT?
A six-foot tree is one thing to store. A six-foot tree with a star permanently sticking another couple of feet above it becomes much more annoying.
Using EMT, screws, and zip ties gives me a simple support system without permanently attaching everything together. When show season is over, I can remove the star and break the prop down into pieces that are much easier to store.
Beginner Tip: Don't overlook storage when you're designing a new prop. Something that's easy to assemble in August can become a giant pain when you're trying to put the entire display away in January.
While the original prop was a very easy prop to setup, it still took time to assemble and take it down each season.
The Star Is Optional
Just like the pixel count we discussed in the previous section, you don't have to build your DIY Pixel Mini Mega Tree exactly like mine.
You could use a different pixel star, change the size, use another mounting method, or leave the star off completely. If you already have an unused star in your collection, you may even be able to adapt it to this design.
For me, the 50-pixel Bethlehem Star was already available, fit the size of the tree nicely, and gave another old prop a reason to come back out of storage.
With the physical build complete, we can move over to the computer.
Next, we'll create the DIY Pixel Mini Mega Tree in xLights and make sure the software matches the way we actually wired the pixels.
8. Setting Up the DIY Pixel Mini Mega Tree in xLights
With the physical build complete, it's time to move into xLights. This is where the way we wired our DIY Pixel Mini Mega Tree becomes especially important.
The xLights model needs to match the physical direction of the pixels on the actual tree. Fortunately, the zigzag pattern we used during the build is easy to reproduce once you understand how the two strings are arranged.
Creating the Mini Mega Tree Model
In the xLights Layout tab, add a tree model and position it where you want it in your display.
For my tree, I'm using:
- 2 strings
- 100 pixels per string
- 4 strands per string
- 25 pixels per strand
- 200 total pixels
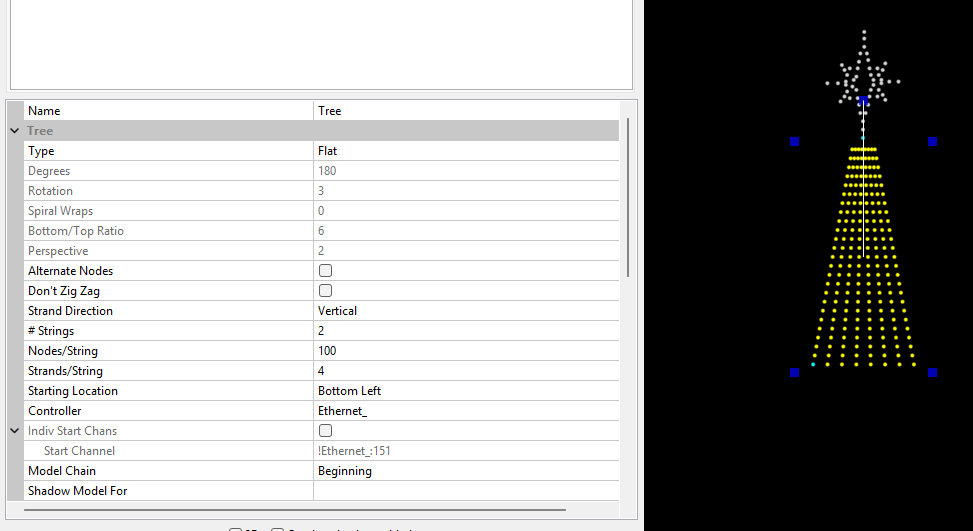
Remember, each 100-pixel string travels across four vertical strips:
Up → Down → Up → Down
The second 100-pixel string repeats that same pattern across the other four strips. This allows our xLights model to match the way the pixels are physically installed on the tree.
Use Wiring View to Check Your Work
One of the easiest ways to verify the model is with Wiring View in xLights.
Right-click the tree model while in the xLights Layout Tab and open Wiring View. This lets you see the path xLights expects the pixels to follow through the prop.
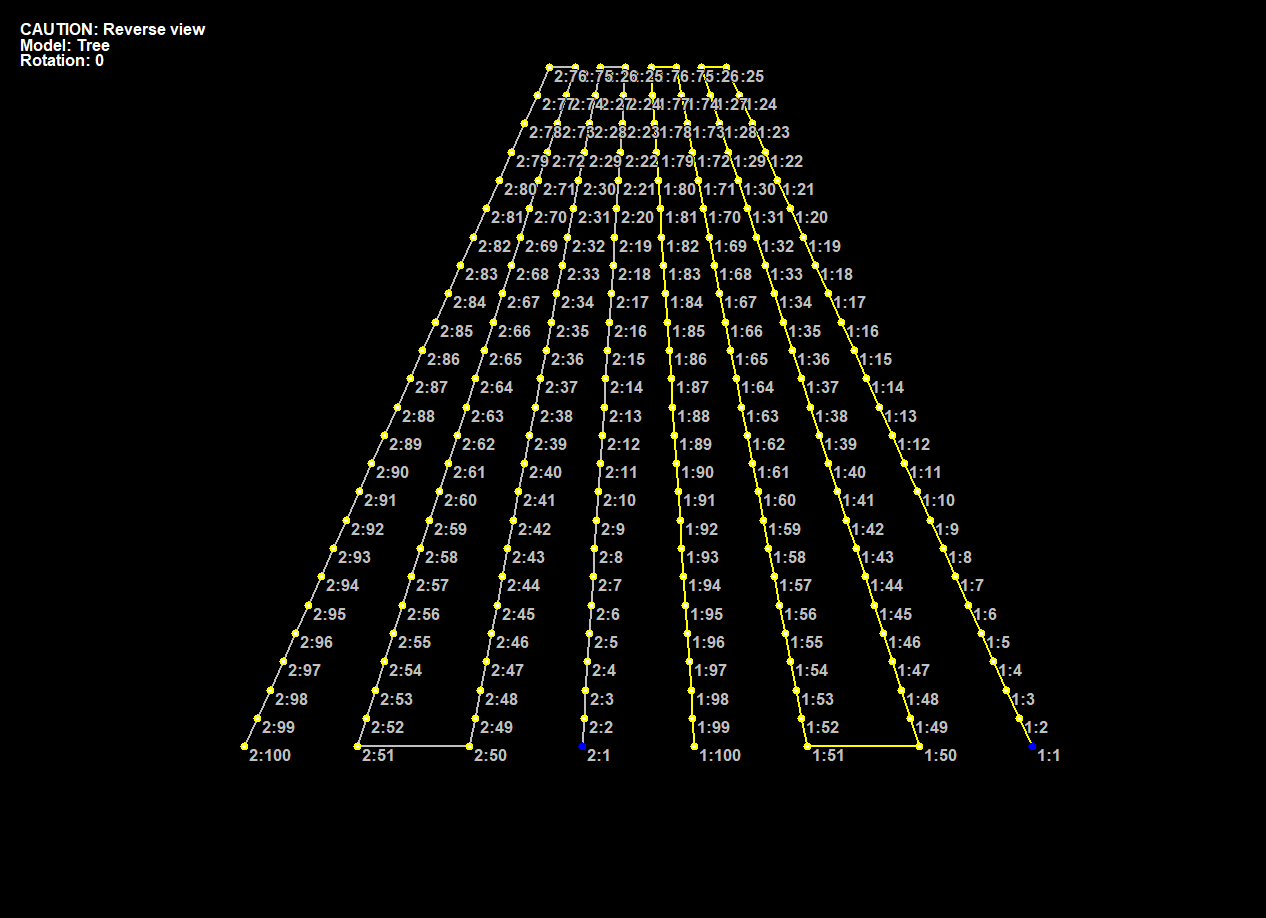
Keep in mind that Wiring View initially defaults the display to show the tree from the back side of the prop.
You can switch it to the front view, by right-clicking and selecting that option. Because the tree is shown from the front during the build, switching Wiring View to the front makes it much easier to compare the xLights model with the physical wiring.
Look at where the first pixel begins and follow the path through each strip. It should match the physical tree.
If xLights thinks your pixels travel one direction while the actual pixels travel another, effects may appear backwards, reversed, or jump between sections of the tree unexpectedly.
Adding the Bethlehem Star in xLights
The star is created as a separate model.
I'm using the existing xLights model for the Boscoyo Bethlehem Star, listed as the Boscoyo Beth Star 2. Since the physical star contains 50 pixels, we can configure it separately from the 200-pixel tree and position it directly above the tree model in our layout.
This model is located in the Model Downloads, under the Boscoyo section.
Keeping the star separate gives us much more control when sequencing. We can apply an effect across the tree while doing something completely different on the star, or group them together when we want effects to work across the complete prop.
Assigning the Controller Outputs
For my test setup, the tree and star use three controller outputs:
Output 1 — 50-pixel Bethlehem Star
Output 2 — First 100-pixel tree string
Output 3 — Second 100-pixel tree string
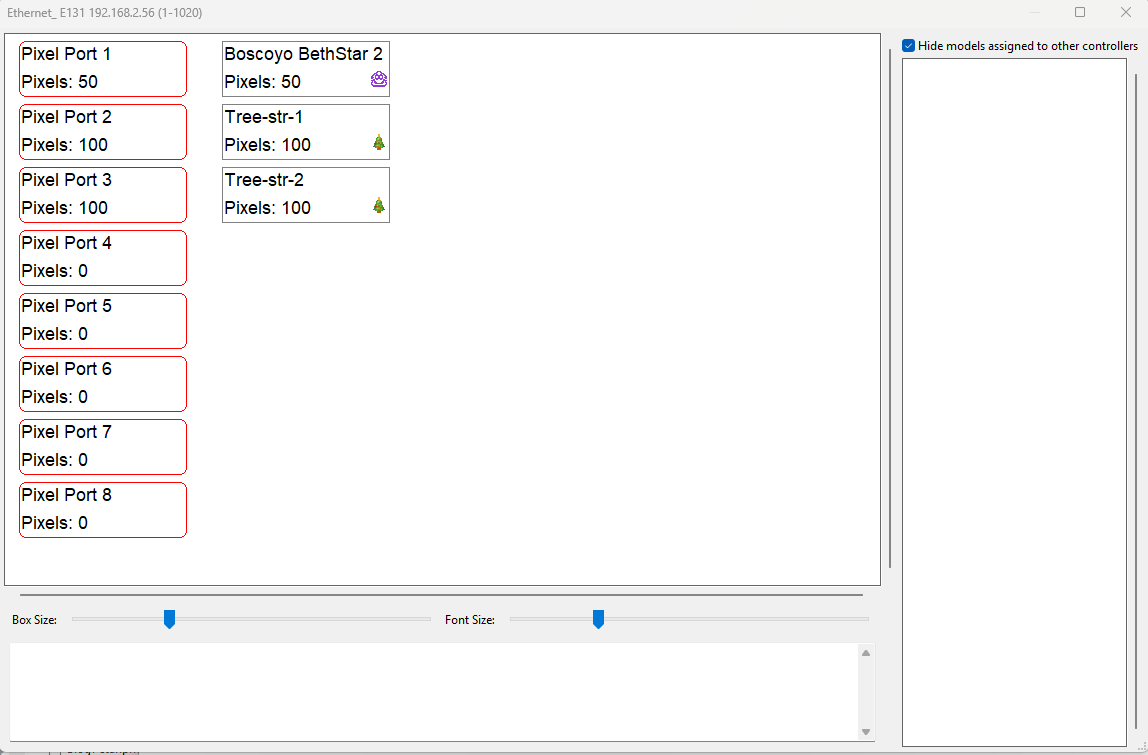
Once the models are assigned to the correct ports, the controller configuration can be uploaded and we're ready to begin testing the physical prop.
If you modified the design from the previous section by adding more strips or increasing the number of pixels, your xLights configuration will naturally be different. That's perfectly fine.
The important rule is simple:
Build the xLights model to match the tree you actually built... not necessarily the tree I built.
Check the Model Before Sequencing
Before spending time creating effects, take a few minutes to make sure the model behaves correctly.
Run a simple Bars effect across the tree and watch the physical pixels. Look for effects moving in the correct direction and verify that all eight strips behave the way they do in the xLights preview.
Watch Content: Testing your Props Using xLights Sequencer
This quick test can catch a wiring or model configuration problem before it becomes much more confusing later.
Once the physical DIY Pixel Mini Mega Tree matches what we're seeing in xLights, we're ready for the fun part.
Let's put some effects on it and see what 200 pixels at 2-inch spacing can actually do.
9. Testing the Finished DIY Pixel Mini Mega Tree
With the physical tree built and the xLights model configured, there's only one thing left to do: turn on the lights and see how it looks.
This is also where we find out whether the extra work we put into increasing the pixel density was worthwhile.
For this DIY Pixel Mini Mega Tree, we're testing 200 5V pixels at 2-inch spacing, with eight strips spread across the front of the tree. The Bethlehem Star adds another 50 pixels above it.
Start with a Simple xLights Test
Before worrying about how the tree looks in a finished sequence, start with a few simple effects in xLights.
This gives you an opportunity to check that:
- Both 100-pixel strings are responding.
- All eight strips are working.
- The zigzag wiring matches the xLights model.
- Effects travel across the tree in the correct direction.
- The Bethlehem Star responds as its own model.
- The physical tree matches what you see in the xLights preview.
If something looks wrong, this is the time to fix it.
A simple effect moving across the tree makes it much easier to spot a reversed strand, incorrect starting location, or xLights configuration problem than trying to troubleshoot it in the middle of a complicated sequence.
How Does 2-Inch Pixel Spacing Look?
This was one of the things I really wanted to see when I rebuilt these trees.
The original version used pixels at approximately 3-inch spacing. That helped keep the pixel count and cost down when I first built them, but we've learned a lot over the years about how much difference additional pixel density can make.
The rebuilt DIY Pixel Mini Mega Tree uses 2-inch spacing with the strips positioned fairly close together at the bottom. Once we started playing effects across it, I was really happy with the amount of definition we were getting from only 200 pixels.
For a prop this size, the effects looked much more detailed than they did on the original trees.
Test the Tree with a Sequence
After verifying that the basic wiring and model are correct, load or import the effects from one of your existing xLights sequences. Render and "output to lights" and see what the tree actually does with real effects.
This is the fun part!
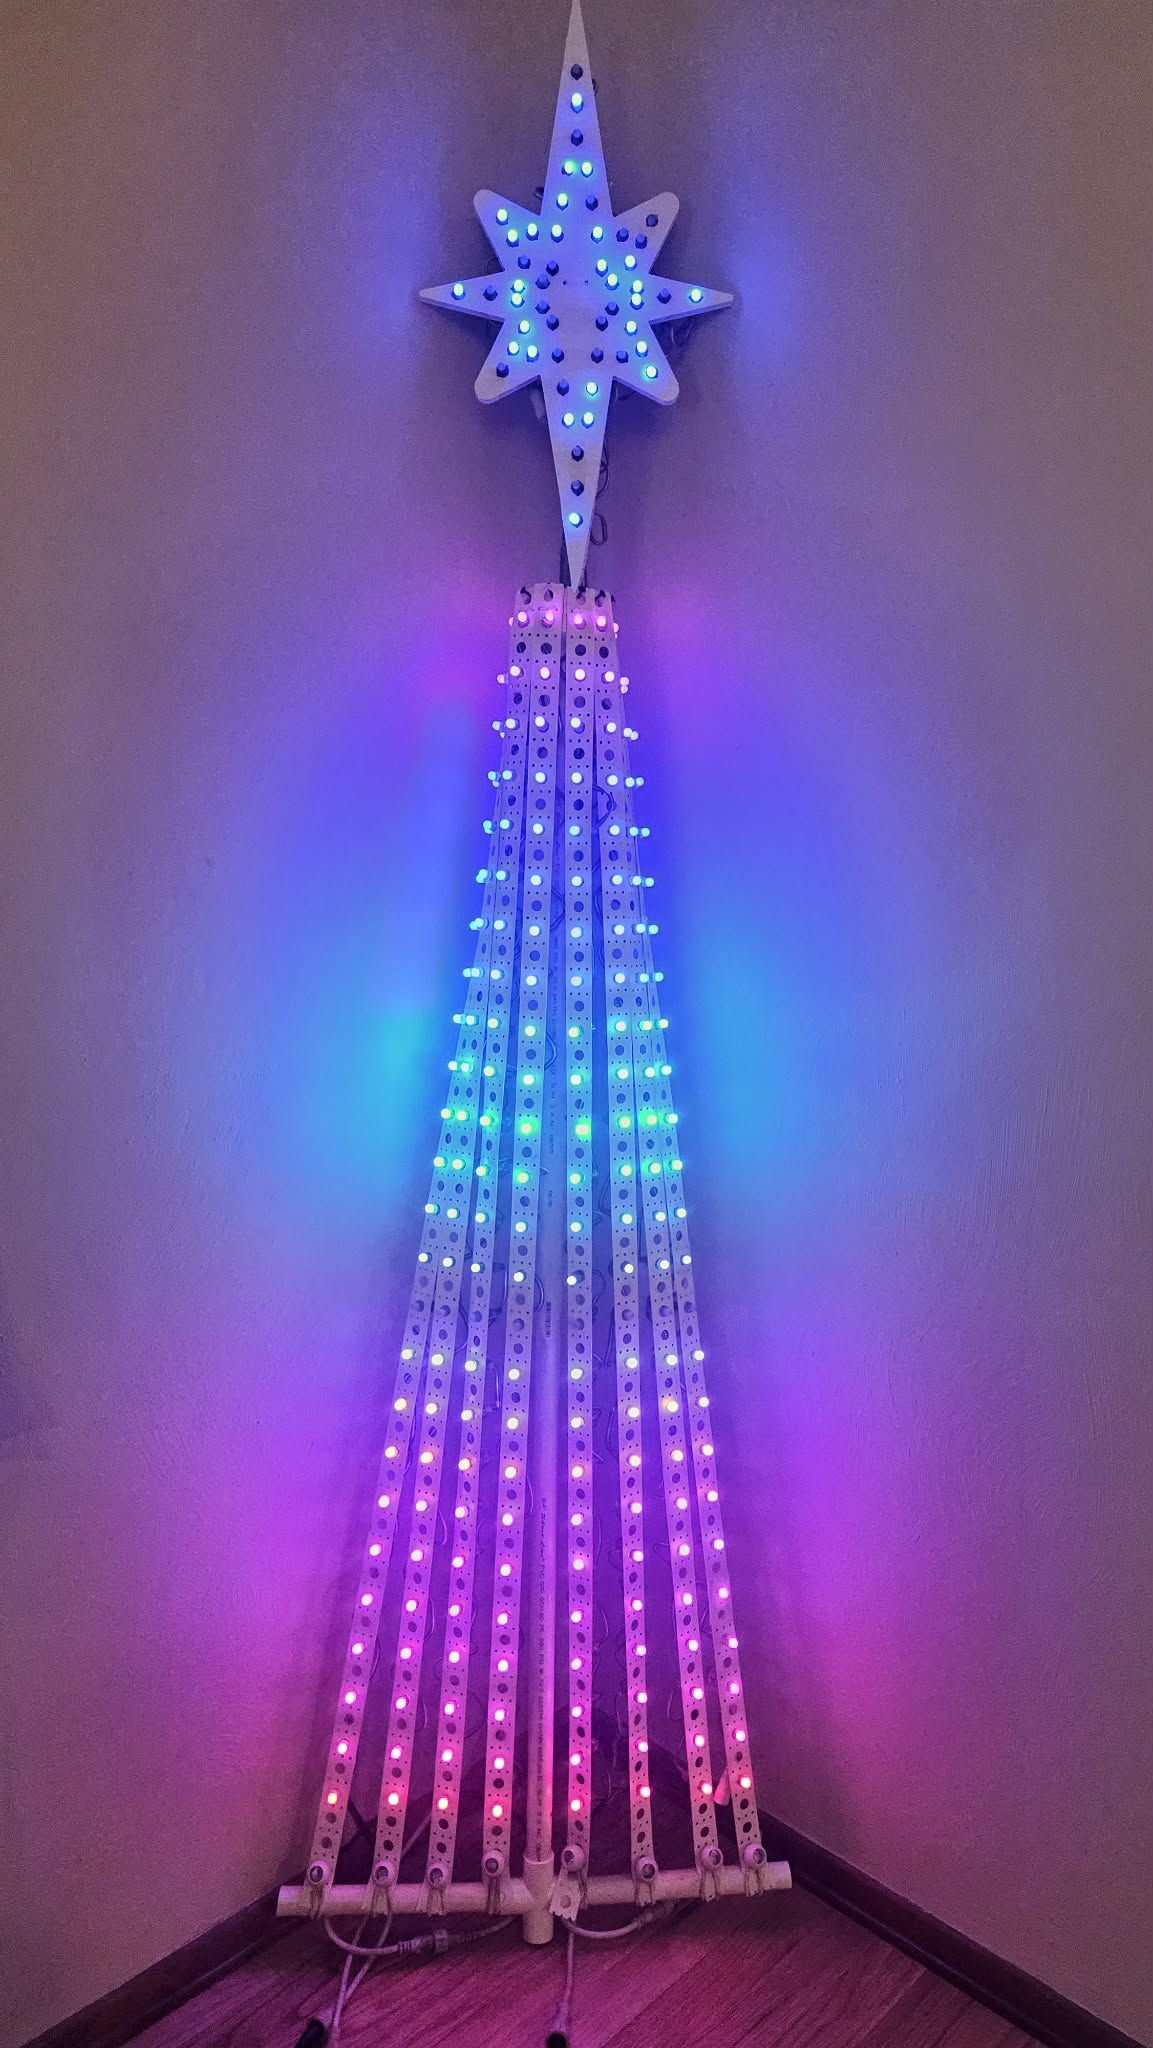
Effects that sweep across the tree, move vertically, change color, or use the individual strands will quickly show you what the additional density adds to the prop.
It's also a good opportunity to experiment with the star. Since the Bethlehem Star is its own xLights model, you can let it complement the effects on the tree instead of simply copying them.
[
Don't Skip the Test Before Installation
I always recommend testing a new or rebuilt prop before putting it out in the yard.
It's much easier to fix a bad extension cord, incorrect controller assignment, or xLights model setting while the tree is sitting in the shop than after you've installed it outside.
In this case, testing was even more important because many of these components had been sitting unused for years.
Once everything is responding correctly and the physical tree matches the xLights preview, the DIY Pixel Mini Mega Tree is officially ready to return to the show.
And for a prop that spent nearly nine years packed away, I'd say that's a pretty good comeback.
10. Reuse What You Already Have
One of the biggest lessons from this DIY Pixel Mini Mega Tree project really has nothing to do with PVC, pixels, or xLights.
It's about looking at what you already have before buying something new.
We spend a lot of money building our Christmas light displays. Over time, we replace props, redesign areas of the yard, change controllers, and move on to newer ideas. However, that doesn't always mean the things we've stopped using are no longer useful.
These Mini Mega Trees are a perfect example.
An Old Prop Doesn't Have to Be a Dead Prop
My original trees hadn't been part of the display since around 2017. For nearly nine years, they sat packed away because I didn't have a good place to use them.
The pixels were old. The design wasn't as dense as I wanted. The original ground-anchor system had problems. Still, most of the components were perfectly usable.
Instead of throwing everything away, I looked at what I didn't like about the original design and asked a much better question:
What can I change to make these useful again?
That led to the redesigned PVC base, two additional pixel strips, closer pixel spacing, bungee-ball attachments, and the addition of a Bethlehem Star.
Suddenly, something that had been sitting in storage for years became a prop I was excited about again.
Check Your Storage Before You Go Shopping
If you've been in this hobby for a few years, there's a chance you have your own version of this project hiding somewhere in a storage tote like I did.
Maybe it's an old Mini Tree. Maybe you have unused pixel mounting strips, an extra star, leftover pixels, PVC from another build, or an entire prop that disappeared from your layout several seasons ago.
Before ordering everything new, go look through those boxes.
You may already have most of what you need for your next project.
For this DIY Pixel Mini Mega Tree, I reused 100 percent of the original components. Strips, pixels, PVC, tools, and more... I also used leftover 5V pixels from other projects for the stars and EMT pieces that were already cut and sitting on my service cart under my Halloween pumpkins.
That kept the cost of rebuilding these trees extremely low.
Improve It Instead of Simply Rebuilding It
Reusing an old prop doesn't mean you have to recreate it exactly the way you originally built it.
Actually, I think that's where some of the fun begins.
You've already had years to learn what worked and what didn't. You've probably learned new construction techniques. Pixels and controllers have changed. Your xLights skills have improved. You may even have tools today that you didn't own when the original prop was built.
Use that experience.
My rebuilt DIY Pixel Mini Mega Tree isn't simply the 2015 version put back together. It's the version I would rather have today.
And that's really the point of this project.
Sometimes the next great addition to your display isn't something you need to order.
It may already be sitting in a tote in your shop, waiting for you to give it another chance.
11. Final Thoughts
Building this DIY Pixel Mini Mega Tree turned out to be more than just another weekend project. It gave me a chance to take something I built years ago, look at it with everything I've learned since then, and turn it into a prop that I'm excited to use again.
The basic design is intentionally simple. A PVC frame, pixel mounting strips, bungee balls, 5V pixels, and a star are really all it takes to put one together. You don't need an elaborate frame or expensive specialty hardware to build a Mini Mega Tree that can produce some great effects in xLights.
My version uses eight strips with 200 pixels at 2-inch spacing, plus a 50-pixel Bethlehem Star. However, as we discussed throughout this build, those numbers aren't rules. They're simply what worked for the materials I had available.
Make the Project Your Own
If you want more density, add more strips. If you want closer pixel spacing, use more pixels. If you already have a different star, figure out a way to mount it. If your controller setup works better with a different wiring pattern, design your xLights model around the way you choose to build the physical tree.
That's one of the best parts of building your own props.
You can take the basic idea and modify it to fit your display.
The important thing is to plan your pixel direction, controller outputs, and xLights model before everything is permanently assembled. As long as the physical prop and the xLights model agree with each other, you have plenty of room to get creative.
Give an Old Prop Another Chance
For me, though, the most satisfying part of this project is seeing these trees running again.
They were built around 2015, removed from the display a couple of years later, and then spent nearly nine years packed away. Now they're rebuilt with better pixel density, a better mounting system, a new star on top, and a new purpose in the show.
If you've been setting up your Christmas display for a while, I'd encourage you to take a look through your own storage before planning your next purchase.
You might have an old prop you've forgotten about. You might have leftover pixels, mounting strips, PVC, stars, or other parts from previous projects.
Pull them out.
Look at them with fresh eyes and ask yourself what you could do differently today.
Sometimes building something new doesn't mean starting from scratch. Sometimes it means taking something you already have and making it better than it was before.
I hope this DIY Pixel Mini Mega Tree gives you an idea for your own display... and maybe inspires you to bring one of your forgotten props back to life.
Continue Learning
How to Set Up a Mega Tree in xLights
Learn how strings, strands, starting locations, and zigzags work when creating your xLights tree model.
How to Build Your First Pixel Controller
Follow our beginner-friendly Baldrick 8 controller build from start to finish.
How to Build the RGB2Go Octa8 Controller: A Beginner's Guide
Build the RGB2Go controller we used while testing projects like this Mini Mega Tree.
Controller Output Labels: Methods and Organization
See how years of trial and error changed the way I label and organize my pixel controllers.